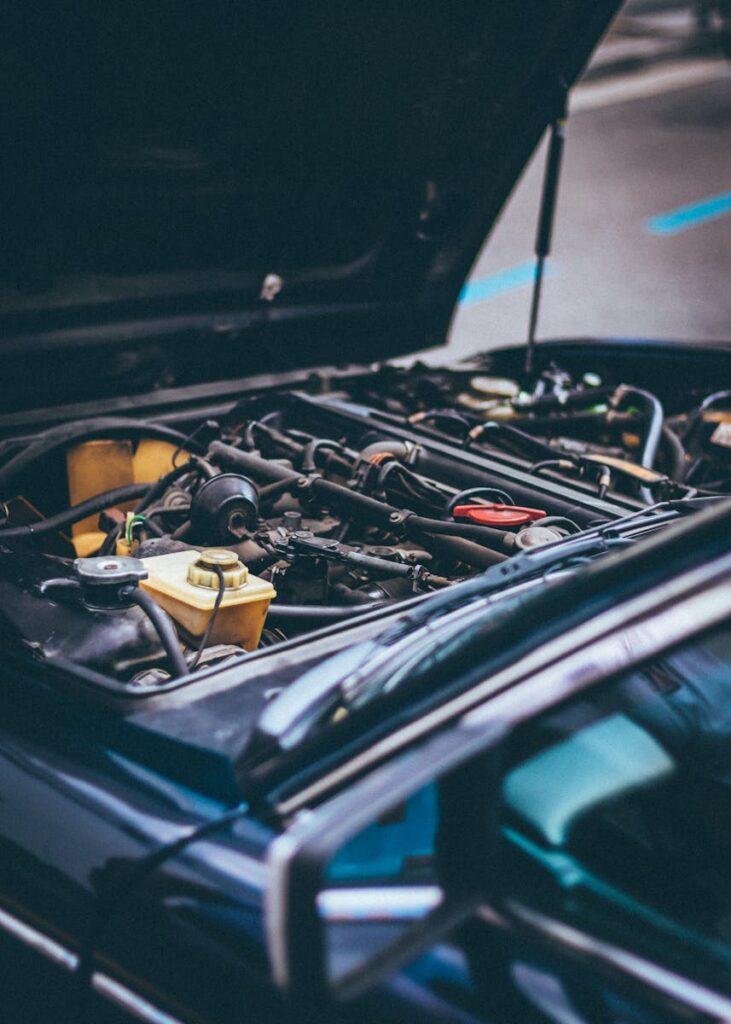
DIY Oil Change: Step-by-Step Guide for Beginners
Changing your vehicle’s oil might seem daunting at first, but it’s one of the most fundamental and rewarding maintenance tasks you can learn. Not only can you save $30-$70 per oil change, but you’ll also gain valuable knowledge about your vehicle’s maintenance needs. In this comprehensive guide, we’ll walk you through every step of the process, from gathering the right tools to properly disposing of used oil. Whether you’re working on a compact sedan or a full-size SUV, these universal principles will help you complete your first oil change with confidence.
💡 Key Benefits:
- Save money on routine maintenance
- Gain hands-on automotive experience
- Ensure quality control of materials used
- Convenient scheduling on your time
- Better understanding of your vehicle’s health
Essential Tools and Materials
Quick Take:
🔧 Total Cost: $50-100 for initial tools, $25-45 for oil and filter
⏱️ Time Required: 30-45 minutes
🛠️ Skill Level: Beginner
⚠️ Safety Priority: Medium-High
Performing your first oil change doesn’t require a professional-grade toolkit, but you’ll need some essential items to get the job done right. Before heading to your local auto parts store, gather these fundamental tools that will serve you through countless future oil changes. Most of these items are one-time purchases that will quickly pay for themselves compared to professional service costs.
Required Tools:
- Socket wrench set (including the specific size for your drain plug)
- Oil filter wrench
- Oil drain pan (at least 2-gallon capacity)
- Funnel
- Work gloves
- Safety glasses
- Wheel chocks
- Car jack and jack stands
- Shop rags or paper towels
- Cardboard or drop cloth for ground protection
Materials Needed:
- Engine oil (check your owner’s manual for type and quantity)
- New oil filter (specific to your vehicle model)
- New drain plug washer (if required for your vehicle)
- Container for old oil disposal
Pro Tip: Always check your owner’s manual for the exact oil specifications. Using the wrong type or viscosity can damage your engine. For most modern vehicles, you’ll need between 4-6 quarts of oil, but some engines require more or less.
Where to Buy: Your local auto parts store will carry everything you need, but you might find better deals online for the tools. Major retailers like AutoZone, O’Reilly Auto Parts, and NAPA typically stock all these items. Expect to spend about $50-100 on your initial tool investment, plus $25-45 for oil and filter, depending on your vehicle’s requirements and oil type selection.
Storage Tip: Create a dedicated oil change kit by storing all these tools together in a sturdy container. This organization will make future oil changes more efficient and ensure you’re not hunting for tools when it’s time for your next service.
Pre-Change Safety Checks and Preparation
Safety should always be your top priority when working on any vehicle. Before you begin your oil change, there are several critical preparations and checks that will ensure both your safety and the success of the maintenance task. Taking these preliminary steps might seem time-consuming, but they’re essential for preventing accidents and ensuring quality results.
Engine Temperature Considerations:
- Warm (not hot) oil drains better than cold oil
- Let engine cool for 30-45 minutes after driving
- Oil temperature should be warm to touch, not hot
- WARNING: Hot oil can cause severe burns
Workspace Requirements:
- Level, solid surface (concrete preferred)
- Well-ventilated area (avoid enclosed spaces)
- Adequate lighting
- Minimum 6 feet of clearance around vehicle
- Away from open flames or sparks
- Clear access to all sides of vehicle
Vehicle Support Procedures:
- Park vehicle on level ground
- Engage parking brake
- Place wheel chocks behind rear tires
- Locate proper jack points (consult owner’s manual)
- Position jack and raise vehicle slowly
- Install jack stands at manufacturer-specified points
⚠️ CRITICAL SAFETY NOTE: Never work under a vehicle supported only by a jack. Always use jack stands rated for your vehicle’s weight.
Environmental Safety Measures:
- Keep spill kit or absorbent materials nearby
- Place drain pan in easy reach before starting
- Have cleanup materials ready
- Protect ground with cardboard or drip pan
- Keep pets and children away from work area
Pre-Change Checklist:
✓ Vehicle is cool enough to work on safely
✓ All tools and materials are within reach
✓ Proper safety equipment is being worn
✓ Vehicle is securely supported on jack stands
✓ Workspace is clean and well-lit
✓ Emergency contacts are readily available
✓ First aid kit is accessible
Pro Tip: Take a photo of your vehicle’s underside before starting. This will help you remember the location of drain plug and filter for future reference. It’s also useful for documenting any existing leaks or issues that might need attention.
Remember: If at any point you feel unsure about the procedure or your safety, don’t hesitate to seek professional assistance. It’s better to ask for help than to risk injury or vehicle damage.
Step-by-Step Oil Change Process
Now that you’ve gathered your supplies and properly prepared your workspace, it’s time to perform the actual oil change. Follow these steps carefully, and don’t rush through the process. Remember, attention to detail during your first few oil changes will help build confidence and proper technique for future maintenance.
Locate and Access Oil Drain Plug
- Position drain pan under the oil drain plug
- Clean area around plug to prevent debris contamination
- Identify plug location (typically lowest point of oil pan)
⚠️ NOTE: Ensure drain pan is large enough to catch oil spray
Remove Oil Drain Plug
- Use appropriately sized socket wrench
- Loosen plug slowly to control oil flow
- Keep pressure on plug while removing to prevent hot oil splash
- Place plug and washer in clean area
Pro Tip: Oil will flow in an arc rather than straight down. Position your drain pan accordingly.
Drain Oil Completely
- Allow 5-10 minutes for complete drainage
- Watch for oil stream to reduce to drops
- Inspect old oil for metal particles or unusual debris
WARNING: If you spot metal shavings or unusual debris, consult a professional mechanic
Remove Old Oil Filter
- Locate oil filter (consult owner’s manual if needed)
- Place drain pan under filter
- Use filter wrench to loosen
- Unscrew by hand, keeping filter upright to prevent spills
NOTE: Oil filter may be hot and contains residual oil
Prepare New Filter
- Compare new filter to old for correct size
- Lubricate new filter gasket with fresh oil
- Fill new filter 2/3 full with new oil (if mounted vertically)
Pro Tip: Pre-filling the filter reduces initial dry running at startup
Install New Components
- Clean oil drain plug and install new washer if required
- Reinstall drain plug (don’t overtighten)
- Torque to specification (typically 25-35 ft-lbs)
- Install new oil filter (hand-tight plus 1/4 turn)
Add New Oil
- Lower vehicle to level position
- Remove oil filler cap
- Insert funnel
- Add manufacturer-specified amount of oil
- Replace oil filler cap
Final Checks
- Start engine
- Check for leaks around drain plug and filter
- Turn off engine and wait 5 minutes
- Check oil level with dipstick
- Add oil if necessary
Verification Checklist:
✓ Oil drain plug properly tightened
✓ Oil filter securely installed
✓ No visible leaks
✓ Correct oil level on dipstick
✓ All tools removed from engine bay
✓ Oil filler cap secured
Disposal Instructions:
- Transfer old oil to approved containers
- Take to local auto parts store for recycling
- Keep receipt for records
- Never dispose of oil in trash or drains
Maintenance Records:
- Record date and mileage
- Note oil type and quantity used
- Save receipt for warranty purposes
- Schedule next change (typically 5,000-7,500 miles)
Troubleshooting Tips:
If you notice any of these issues, stop and consult a professional:
- Oil pressure light remains on after startup
- Unusual noises after oil change
- Persistent leaks
- Smoke from engine
- Oil level dropping rapidly
Pro Tip: Take photos during your first oil change to create your own visual guide for future reference. Pay special attention to drain plug and filter locations, as these can vary significantly between vehicles.
Final Thoughts and Tips for Success
Completing your first DIY oil change is a significant milestone in your journey toward automotive self-sufficiency. While it may have taken longer than a professional service, the knowledge and confidence you’ve gained are invaluable. Remember that each oil change you perform will become easier and faster as you become more familiar with your vehicle’s specific requirements.
Keep in mind that regular oil changes are just one part of a comprehensive vehicle maintenance schedule. Use this experience as a stepping stone to learn other basic maintenance tasks. Always refer to your owner’s manual for maintenance intervals, and don’t hesitate to consult a professional if you encounter anything unusual during your oil changes.
Pro Tips for Future Oil Changes:
- Create a maintenance log to track oil change dates and mileage
- Store all your oil change tools together in a dedicated container
- Consider investing in ramps or a low-profile jack for easier access
- Keep a few quarts of your vehicle’s specified oil on hand
- Save your receipts for warranty documentation
Have questions about your first oil change? Feel free to comment below, and our automotive experts will be happy to help. For more DIY maintenance guides and automotive tips, subscribe to our newsletter or visit our maintenance section.